 Ember Noise
Getting started with Ember Noise
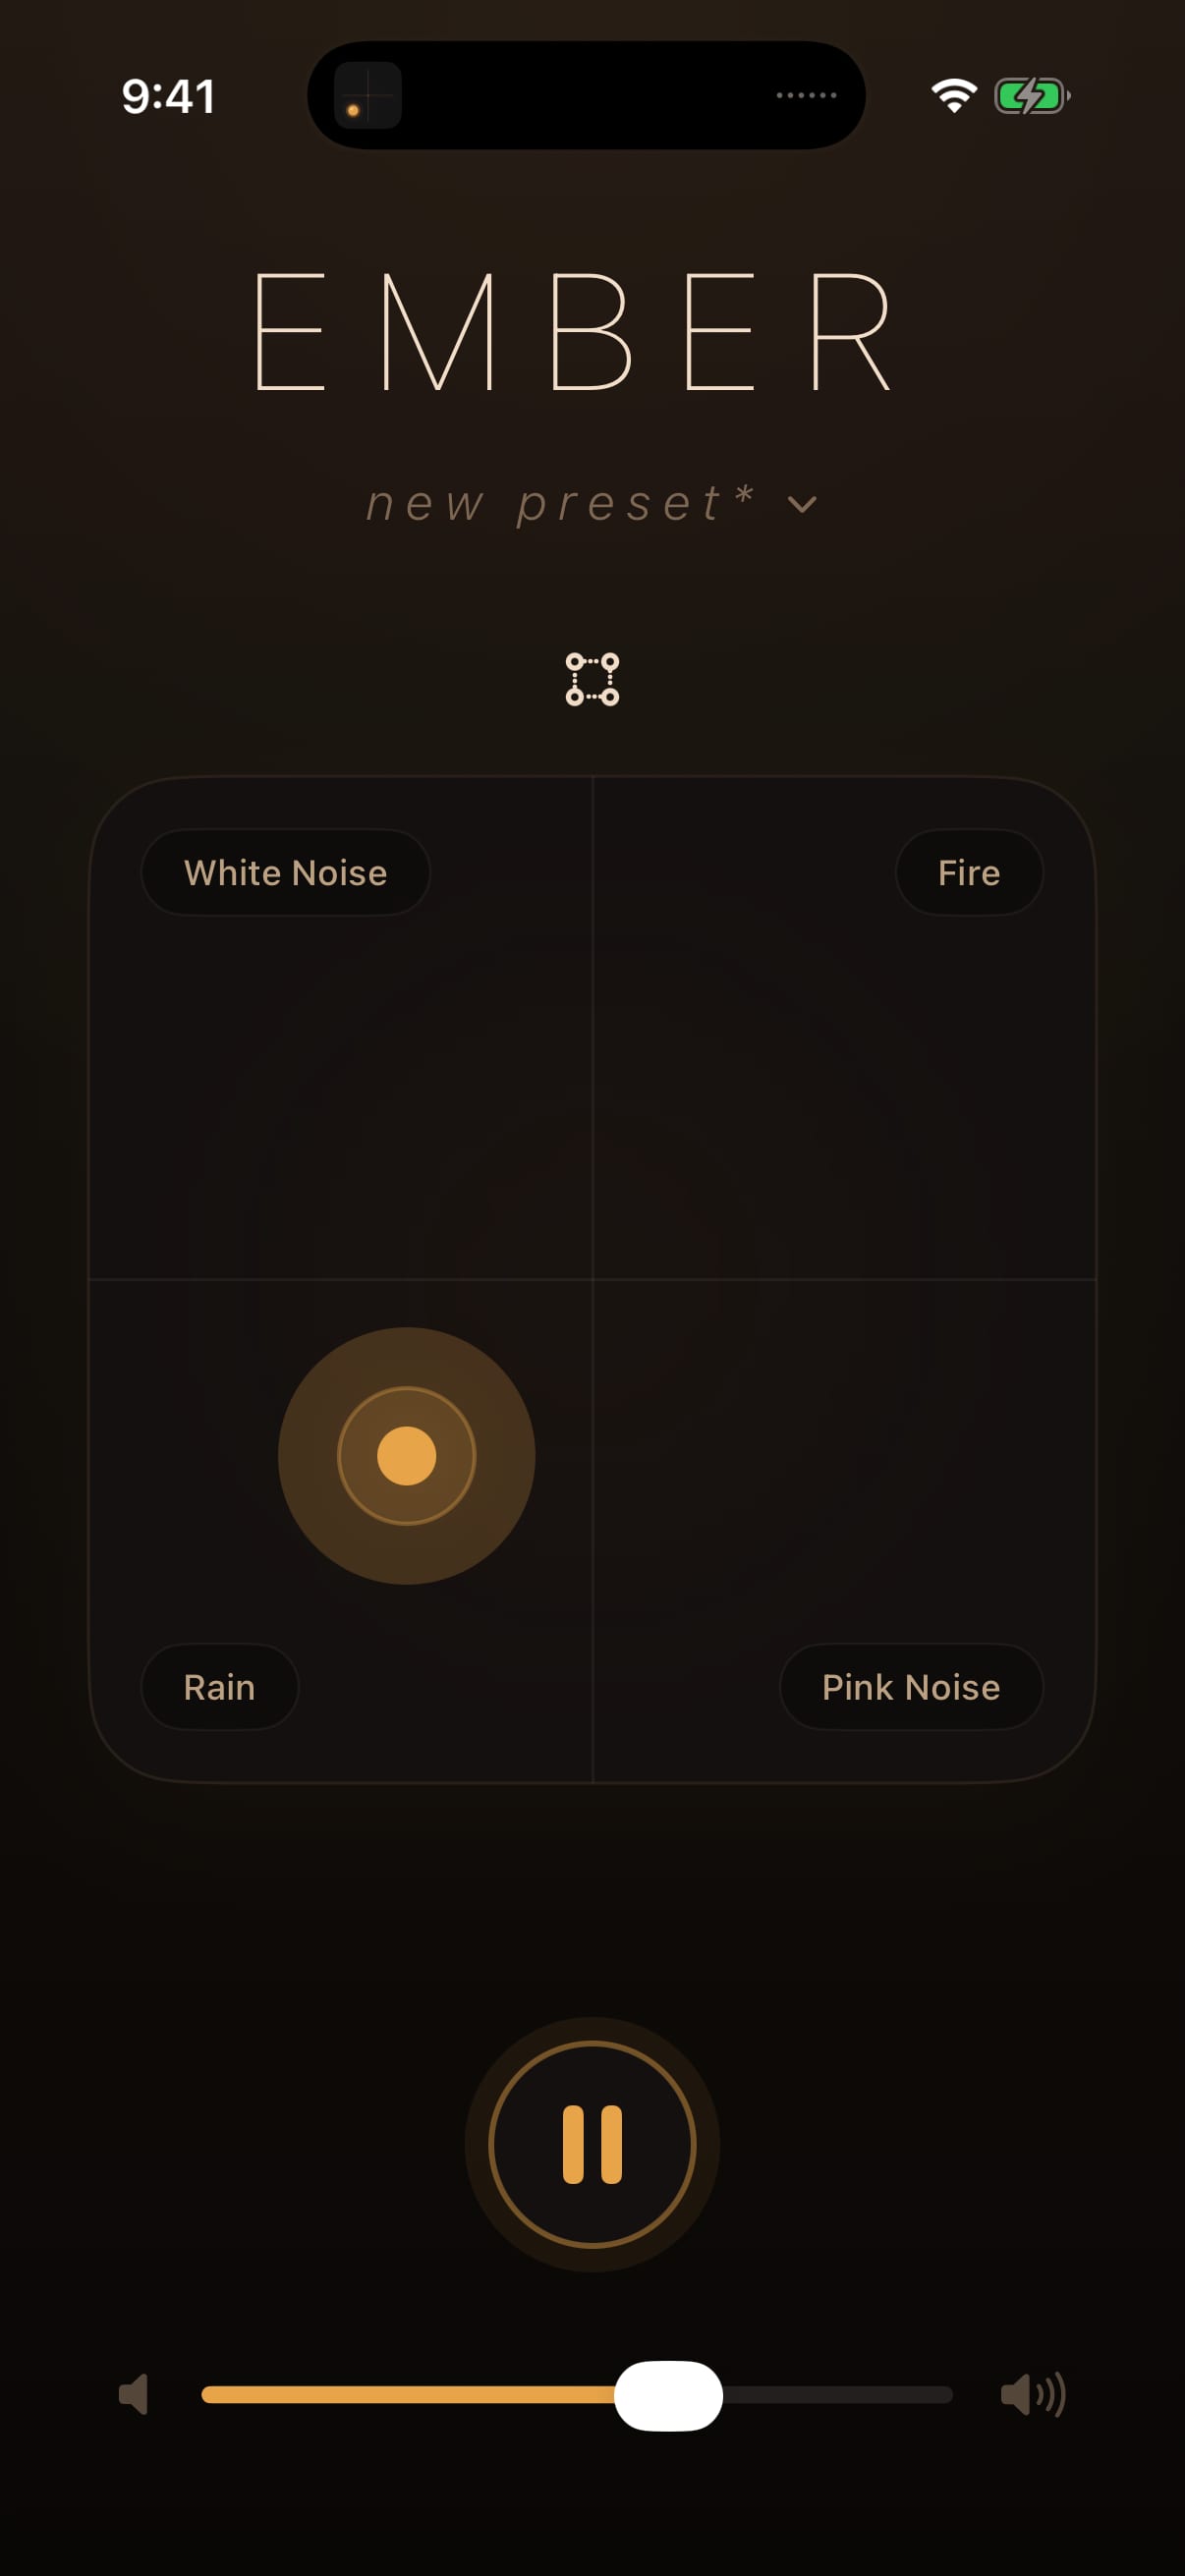
Ember Noise starts making sound in two gestures: press Play, then drag. On first launch, an optional eight-step Welcome can walk you through those controls. It covers playback, blending, corner sounds, presets, and where to find the replayable lessons. You can skip it and replay it later from ? → Learn Ember → Welcome.
The mixer screen
When the app opens you see the mixer, a large square divided into four quadrants, with a sound name pinned in each corner and a glowing amber dot near the middle. That dot is the ember. Its position decides how much of each corner sound you hear.
Below the mixer are the play/pause button and the master volume slider. On iPad in landscape and on the Mac, the transport sits beside the mixer instead of below it, leaving more room for the canvas.
First listen
- Press Play. All four corner sounds begin looping.
- Drag or tap the matrix. The blend follows the ember immediately.
- Explore the space. The center gives you an even four-way blend. Each corner isolates its assigned sound.
- Set your volume. The master slider controls the finished blend.
Every built-in sound ships in the free app and plays offline. There are no ads or subscriptions, and you can begin without creating an account or configuring a service.
Where to go next
- Swap any corner for a different sound. See the matrix mixer.
- Search, audition, favorite, and organize the library, or shape a sound’s tone with EQ. See sounds & EQ.
- Save the blend you just made so it is one tap away tonight. See presets & automation.
- Learn one feature at a time with seven replayable lessons. See learning & support.